Friday, 17 April 2015

Rocks Test: Off the Map

I wanted to further test tessellation and also learn how to model rocks; I’ve heard this can be an extremely difficult process so I wanted to get it out of the way early.

I watched many, many, many tutorially on how to create game ready rocks. Below I am simply going through all of the processes I’m not actually trying to make a good game ready rock. I’m just trying to memorise the process so that I can add these processes to my work flow. I can come back to these later maybe and make the rocks for our level. For now I’m just making place holders for Jake to populate our mock cave system with.

I’ve learnt that when making rocks for use in games you make the rock as reusable as possible. An entire cave system in a game might be made from two rocks that have bean cleverly flipped and rotated in such a way to make it difficult to sea repeating features.

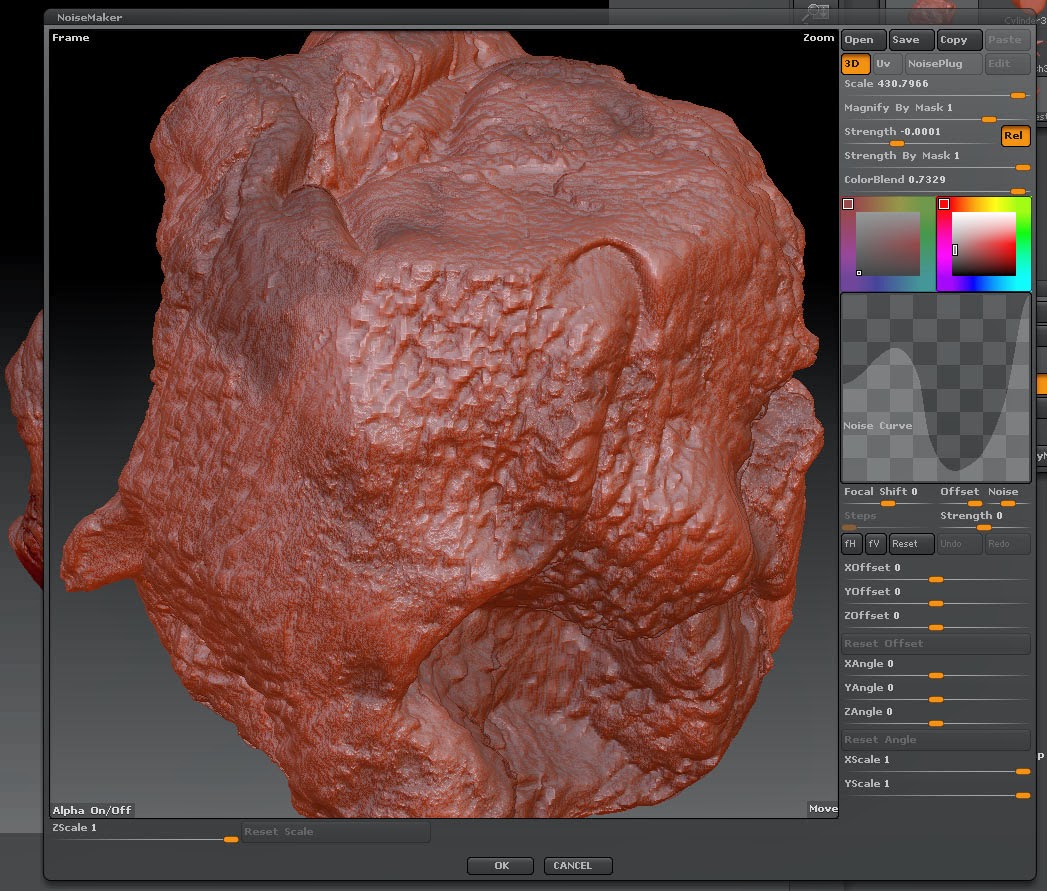
First you model a high poly rock in Z-Brush. You can start from a base mesh made in 3DS-Max, or you can jump straight into a 3D Primitive in Z-Brush. The two most important brushes here are the “Clay Build-up Brush” and the “Trim Dynamic Brush”. Use these to make a good silhouette at first and then sub divide as the details your making get smaller. It’s important to stay at the lowest subdivision you can at any point otherwise your “Smooth Brush” which you are reliant upon though out sculpting can quickly become unusable.  

It’s important to be looking at a rock reference throughout this process; over wise you might end up with a rock similar to mine if you stray from your ref.

Once you have all the relatively large details and features, you now have to add macro surface detail. This can be done by creating an Alpha in Photoshop and then using it to create surface detail in Z-Brush. What I have done below is used the “Surface” modifiers. This Tab allows you to pick a rock type and then apply this to your whole sculpt, and then using the sliders in this modifier you can further edit the surface quality.


Damn this is an ugly rock.


Now you have the high poly of your rock. This is where during this process I got a bit lost. I knew that I had to keep this high poly rock and also have a low poly version of this same rock. But both these rocks must share the same unwrap coordinates.

What I did was try and unwrap this high poly rock in Z-Brush straight away, this failed due to an extremely high tri count crashing Z-Brush. So I then first decimated it significantly. It’s really amazing how you can decimate a mesh to within 10% of its original size without losing any surface detail. I could now unwrap this mesh in Z-Brush, this was extremely simple.

This mesh though was still far to tri heavy for use in game so it needed further retopologizing. Further decimation then loses the unwarp, so I found myself stuck.


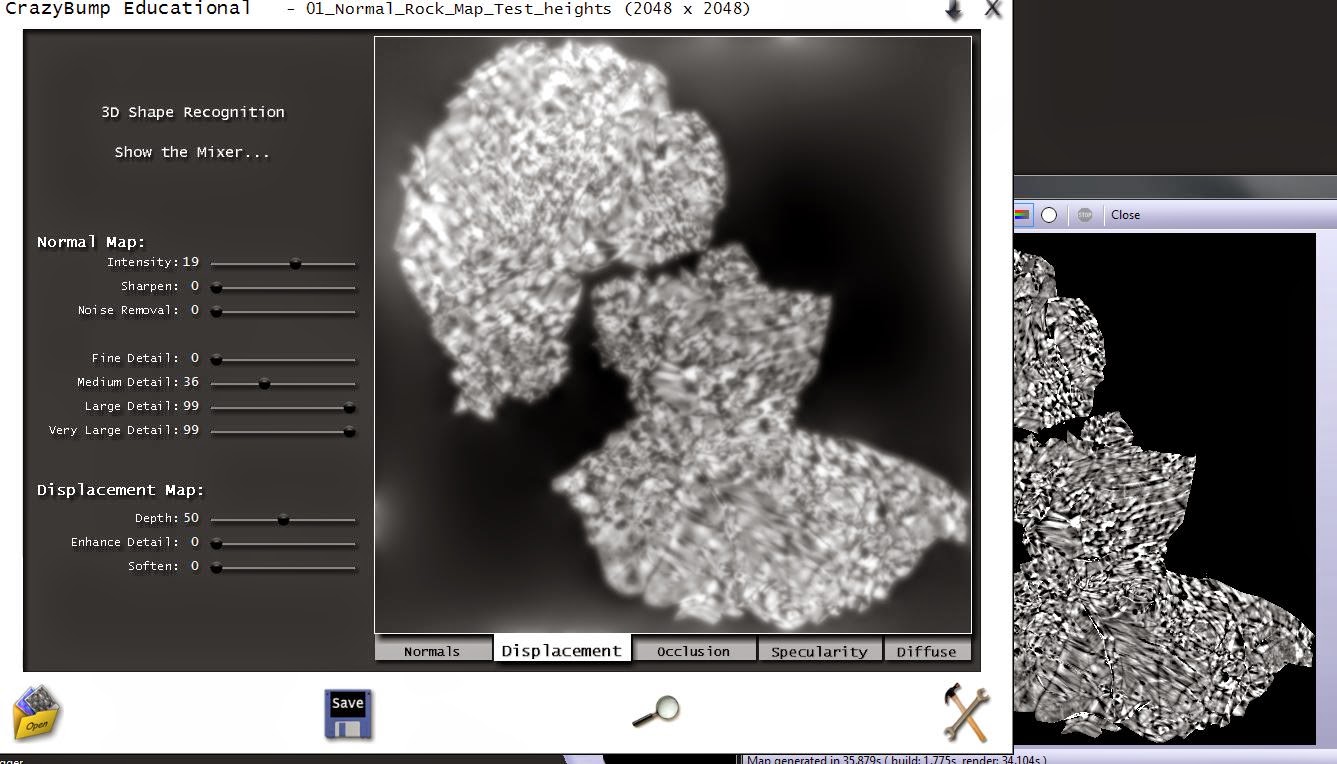
What I did to create my finale rocks was not the correct way of going through this process. What I finally did was further decimate the mesh and then re-unwrap it, I then saved this as an OBJ. I then went into X-Normal and backed the exported unwrapped high poly onto the unwrapped low poly although they were unwrapped at separate times. This did actually create a normal map, I also backed out a Height map.


The heightmap was extremely harsh so I smoothed it off a bit in crazy bump.


These are my finished crappy rocks. These might not be very good but they served their purpose which was to teach me a whole new bunch of processes. I still have allot to learn here especially with retopologizing. These rocks will serve their place though, I was asked to create some place holder rocks, some basic shapes made in 3DS-Max would probably have sufficed.  Instead I learnt a bunch of new processes that I can add to my work flow where needed.

If I was making game ready rocks I would have also poly painted my high poly model, probably using “Spot light” and exported the Albedo from Z-Brush. I could also use Z-Brush or X-Normal to bake an AO Map; I don’t currently know the best way to create an AO. Up to this point I have been making them manually in Photoshop, or I’ve backed them out of X-Normal. I know that you can also use Z-Brush or Crazy bump, but I haven’t compared the results between all these methods yet.


I tested several different Tessellation methods. From this moment on I pretty much tested tessellation on pretty much every texture I did just to try and get better understanding of it. You’ll see in allot of the upcoming textures tessellation will be turned on even if the material doesn’t have correct Nodes for tessellation. This would be because at some point I probably experimented with tessellating the material. 

I have since worked out how to correctly bake down from a high poly. If you start with your high poly simply export this (Decimate it if its size is too big for your baking software), Then create a low poly of this and unwrap it, then bake these together. The high poly doesn’t need an unwrap.


Tessellation: Off the Map

I have been experimenting with Tessellation. Here I have researched many ways of tessellating a surface. I have then created a height map and then tested this on a basic shape.


Tessellating at this basic level is actually quite simple. The Node tree in the image above is all that is necessary. The material also needs to have the tessellation settings moved from “No Tessellation” and changed to “Flat Tessellation” or “PN Triangles”.


Both the above objects have the same Geometry, one of them simply has the above material applied to it. As you can see the tessellation test has been successful. I am worried about whether we will be able to use tessellation in our level, this is due to it being really quite demanding. I think that we should at least try. Judging by the level set by the very best looking games right now tessellation is soon going to become a standard for at least all large surfaces in games, and we need to at least try and reach these standards.


3D Concepting the Puzzle Room: Off the Map


The main aim here was to try and create an extremely complex room that actually only consisted of a handful of parts.


The Barrel Vault ceiling is what I’m going to keep from these images. The doors are far to exaggerated; they’re not that relatable any more.

Here I have tested 4 different roofs. The first is a highly complex repeating pattern, the second is a vaulted ceiling with the detail from the first design projected on to the centre square of each vault. The third is just the vaulted ceiling.


I was very pleased with all of these designs, but they are extremely tri heavy. The above ceiling in particular is a 30 thousands try ceiling. This seams extremely high but this is the entire ceiling for the room. This room in game at this point will be all that will be loaded, so the engine should easily be able to run it. For this project we have no budged requirements we have only three things to take into account, does it look good, how to make it look at its best, and does it run. The first ceiling does cover all of these points so it would be fine to use it as a game asset in this scenario.

The way I have modelled these pieces also means that I can easily break up the panels and add large dynamic cracks.


Due to worries about the tri budget of the first roof from members of my group, I did model and texture a version which had all the detail projected on to it. In the above image you can see the result of this. Normaling this design cannot replicate the light and shadow that this surface detail would create as vividly as using geometry.


Projection Mapping


Projected Detail


I found that the above roof design was the most successful; the larger easily read forms create greater contrast across the roof. This roof is also only about 3000 tris so I also don’t have to worry about having a ridiculously high tri count. But once again I wanted to push the surface detail as I want this room to be an extremely over designed room, a real show of wealth. The centre projection maps here are barely reading so I did another projection map pass.


Projection mapping

This Time I kept to larger more readable shapes.


I also re did the bit that sits between the ceiling and the wall. This roof is extremely complex, and sets a design style for the rest of the room to follow.


Random Caterpillar Mood Board: Off the Map


I decided to make a mood board to help Hannah push the Caterpillar design. Here I have included images of Smaug the Dragon because they have captured so much character in a non human face. Smaug also has a similar perceived personality to the caterpillar, he’s highly intelligent, extremely confrontational and he also appears to talk in riddles. So Smaugs design elements that get across his personality so well even in a still image should be transplanted into out caterpillar where we can.

I’ve also grabbed images of the most drastic and oddly shaped caterpillars I could find. Some of these have many huge and frequent protrusions; some appear to be wearing large hairy coats. I was hoping that these images could help push the silhouette, or simply add further areas of interest, maybe textually or by adding personality.

After creating this mood board I realised that I hadn’t actively tried to only look for British caterpillars. Part of me thought that there was room for him being foreign due to the style of pipe that he is smoking.  I then decided that this could be risky, the British Library once marked a previous team down strongly due to including chocolate fondants in a level that was set in a time before they would have been available. So If were to base the caterpillar on a none native British species and this was found out, the Library could question how the Caterpillar  came to be in an Oxford forest talking to Alice. So can we do a well-travelled caterpillar? I don’t know, also I’m not designing it so it isn’t my decision to make, but I have disgust this with Hannah and the rest of the group. This question did make me research British caterpillars and what was really nice to see was allot of the interesting and tropical looking caterpillars are actually indigenous to Britain. We have a wide and rich collection of caterpillars. Often it’s easy to forget that Britain does have some amazing wildlife.


Puzzle Room: Off the Map


Here I have concepted the puzzle room. This one uses imagery from Christ church. I’ve also spent a lot of time trying to come up with ideas for puzzles. Here I have created a timed jumping puzzle. This includes shrinking, climbing up a book shelf, and then using the rising heat from the lights to bounce yourself over the room to the door in time to pass through it.

I’ve decided post this idea that the book gives us enough in the way mechanics to work with, we shouldn’t have to make up anything new for this puzzle. In the Book she is normal sized, she then drinks and shrinks, and eats some cake and then becomes giant, finally she picks up the nose gay and shrinks again and never actually gets through the door this attempt. There are enough different sizes and items in this area to make a good puzzle, we have to just copy the book, or come up with our own less linear puzzle.


This time I went for a nonsensical room. I decided to have an upside down version of the room on the ceiling, but not actually change the gravity. So a clock has fallen from the above fire, as well as the smoke simply flowing up as you would expect.

I preferred the colour pallet and tone of this room, a stark white room could contrast nicely with darkness and crude colours of the concepted caves and halls prior to this area.

The floor design here has the same pattern as the floor in Christ Church Cathedral.


Here I’ve come up with a new way of completing this room. You walk in normal sized and step over a fallen clock, walk to the far wall which is the first impasse you have come up to in the game, so you have nowhere to go but turn around and walk back through the room.  This time you come across the glass table and the door further down the hall, you walk back to the table and this time fined the bottle which shrinks you, you now can’t get to the door because it’s blocked by the fallen clock you stepped over on your way into the room. You now fined some cakes and get giant, so you still can’t get through the door but now you can push the fallen clock out of the way of the door. Then walk back to the table drink the drink and shrink and now you are free to leave through the door.


A concept taking influences from my concepted fall environment.


Canal Design: Off the Map


New and improved mood board. I’ve tried to make shore that allot of these images are of scenes in Oxford itself. I’ve also included some wild flowers and meadows.


Deigning the layout of the Canal area

One of the challenges here was trying to design a small area, without making the character feel like they are artificially being restricted of what they can sea and explore. I could easily block off one direction with a bridge, but then I couldn’t repeat this on the other side, I then tried to use fencing and a bend in the canal to deny the player travel further down river.


3D concepting

This helped me move around the area in 3D space so that I could ascertain just how restricting the area felt. Also the general composition of the area in real world space could be felt. This is an extremely early white box.


More Concepts: Off the Map


Falling Photo bash

I found talking about this part of the book interesting. I have concepted what I thought was the excepted environment for this area, an endless black void with floating timely furniture to fall past. Hannah in our group also did a concept for this area which consisted of a long tunnel with the walls packed with book shelves and ornaments.

The above image is what she imagined when she pictured this area. Two people given the same information have imagined to starkly different environments, obviously this is to be expected, but it’s still interesting.


Landing Zone Concept

It was difficult trying to accurately concept a pile of “Sticks and Shavings”, what exactly is this. He doesn’t describe it as a pile of Hay or maybe Leaves or any other known piles of stuff, all we have to work with is “Sticks and “Shavings”.

The colour pallet is dark and moody, but I’ve still kept some good strong exaggerated colours. I’m using these colours to push the fantasy element of the world.


Caves to hall Transition

Here I’ve concepted that as you travel though the caves the environment slowly changed until you’re suddenly in an elegant hallway.


Here I’ve added some 2D foreground planes. This should help to enclose her in real space, not a long hall with the near wall missing. This is something that we are going to have to take into account with all our environments, we might not be able to see what is behind the camera when playing a side scroller but the world needs to believably continue beyond it. As well as when she is enclosed in a space this also must be made clear.

Here I’ve also included some animations and particle affects that could be added to bring the world to life.

With all the elements of these concepts as a group have been careful to try and reference Oxford and Christ Church where we can. This is due to the idea that if this is simply a dream that Alice is having then all the imagery would come from things that she has seen. Alice was the daughter of the Dane of Christ Church and lived within its walls so she would have been familiar with it. She also would have known Oxford well. Alices dreams like our own would have been set in or at least drawn allot of influence from areas that she was most familiar with.