Wednesday 29 October 2014

Film Room Prject

Choosing the room

being overly ambitious


Narrowing the search


X-Men First Class


Perspective Tool


Allocating Tasks


White Box


We did have some problems with illness and people generally not turning up, Me and Carl had to do more than our allocated assets.  
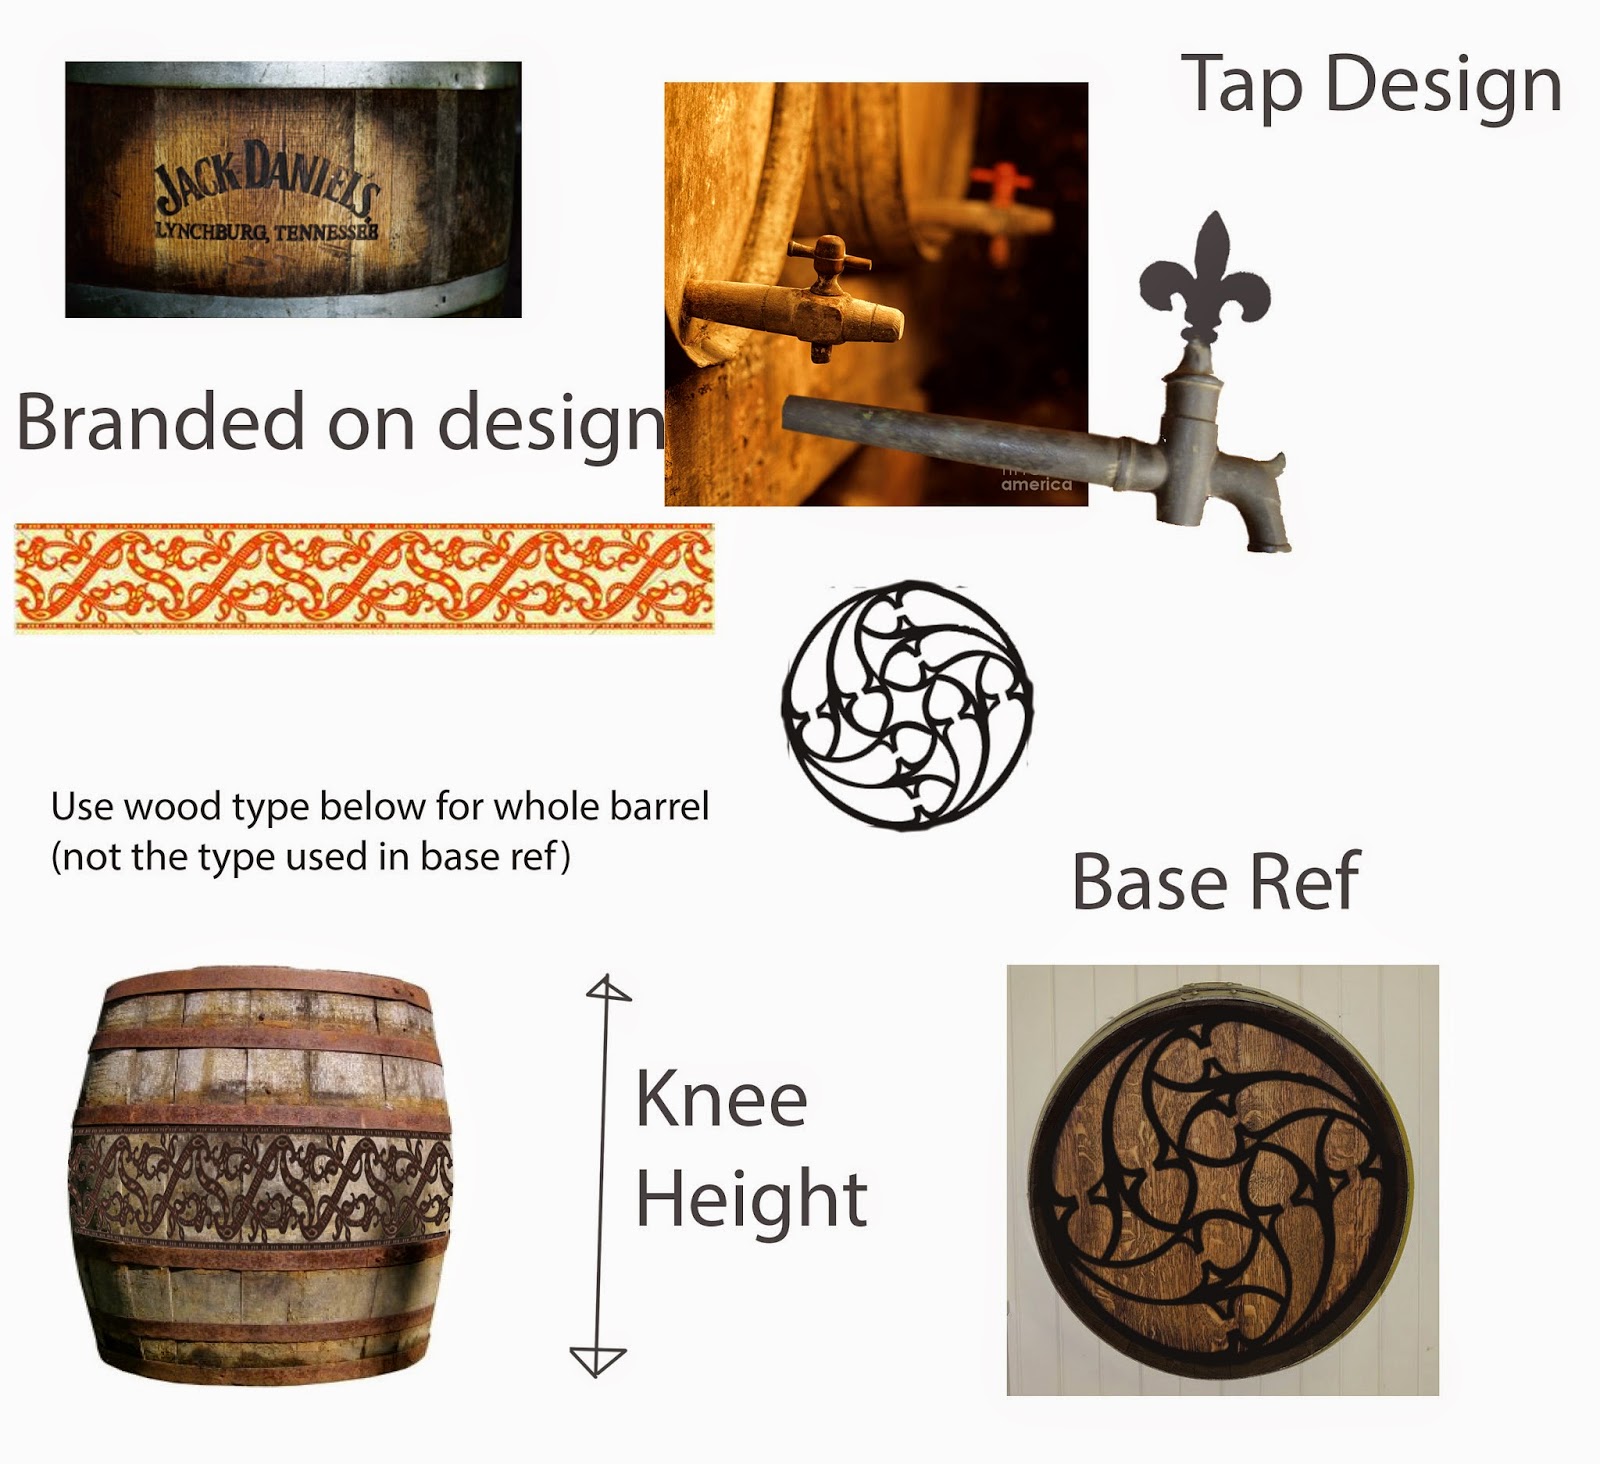
My Assets


Carls Assets


Texturing
Projection Mapping

During this Project I tried to teach everyone in my group how to Projection map and also how to bake using X-Normal and Z-Brush. But due to the time constraints and the general pressures of this project, it was quite hard to find time where some one could learn a new process. Particularly Z-Brush, I think I was the only person in this project to use Z-Brush.


The Curve here and the inset behind the switch aren't geometry. This was done by Carl.


Projection mapping the sheets on the table, I used projection mapping here to get Albedo information and a normal map. These textures were then applied to a single plain. two tries replicating several hundred. 


Z-Brush


I used projection mapping on the couch to get the normal information for the indent. I then duplicated the indent and warped it. On the Albedo layer I made shore there was a light patch under every indent. I also used a height map for the general couch texture, so here I have used Z-Brush, High to low poly baking, projection mapping, height maps and Crazy Bump on one texture sheet. 

Glass


This is a glass Material I made in engine, I followed an online tutorial, but found the glass to be barely visible, after allot of alterations, changing powers, adding normal maps (up to three) and many different colors changes, I managed to get closer to the glass in the scene. 


LUT

I also created and used a LUT and a post processing volume to desaturate the scene and add more white. 


Finale Images

This is the finale Scene


And I also textured the Floor.


Asset Swap


Week 1, Year 2

Right back to work

Introduction to team projects

In a group we had to concept, model, unwrap, texture, give feedback and then do a second texture pass on a series of assets.
In our group we had a problem with people joining and then leaving our group, so the swapping system fell apart, leading too many people doing several steps for the same asset.
I also did some additional work.

Concepting Barrel

Model Table


Unwrap Barrel 


Texturing Table


I used Z-brush here to add wear to the table, also it was necessary for the details on the underside of the table.
I used this high poly, with the low poly(original table) to bake out a normal map from X-Normal.
Here I uncounted a problem. The bake for the underside of the design wasn't working very well.


This was due to both side of this panel occupying the same texture space. One side of the Z-brush sculpt was flat, and the other had this design on it. This meant that the bake was putting flat and detailed information onto the same texture space.
At the time I didn’t know how to solve this problem. Now I know that in order to solve this, I would have to adjust the UV’s and make a separate MAX file just to get the desired bake.
I now know that when exporting object with multiple parts into z-Brush with the intention of then baking, you should export and edit each individual part separately. And any shared texture space must be separated.


I added wear to the surface via the Albedo map. I also tried to create variations in roughness, where varnish would have been worn off. But as this was the first time using PBR I still hasn't gotten used to roughness maps and inevitably made it far to shiny. 


Feed Back


I also gave some brief feedback on the barrel


Texture Second Pass


These are the textures I was handed, as you can see there are many problems here.
Very simple flat textures, little to no detail, not life like, incorrect metalness maps also the object has 2 sub object ID’s. 


These are my maps, again here I used Z brush to get the normal maps. I also used Z-Brush to paint out seams using the poly paint function. This was also handy for painting burn marks and other variances in Albedo.

Final Images