Wednesday, 28 October 2015

Finished Roller

Overview

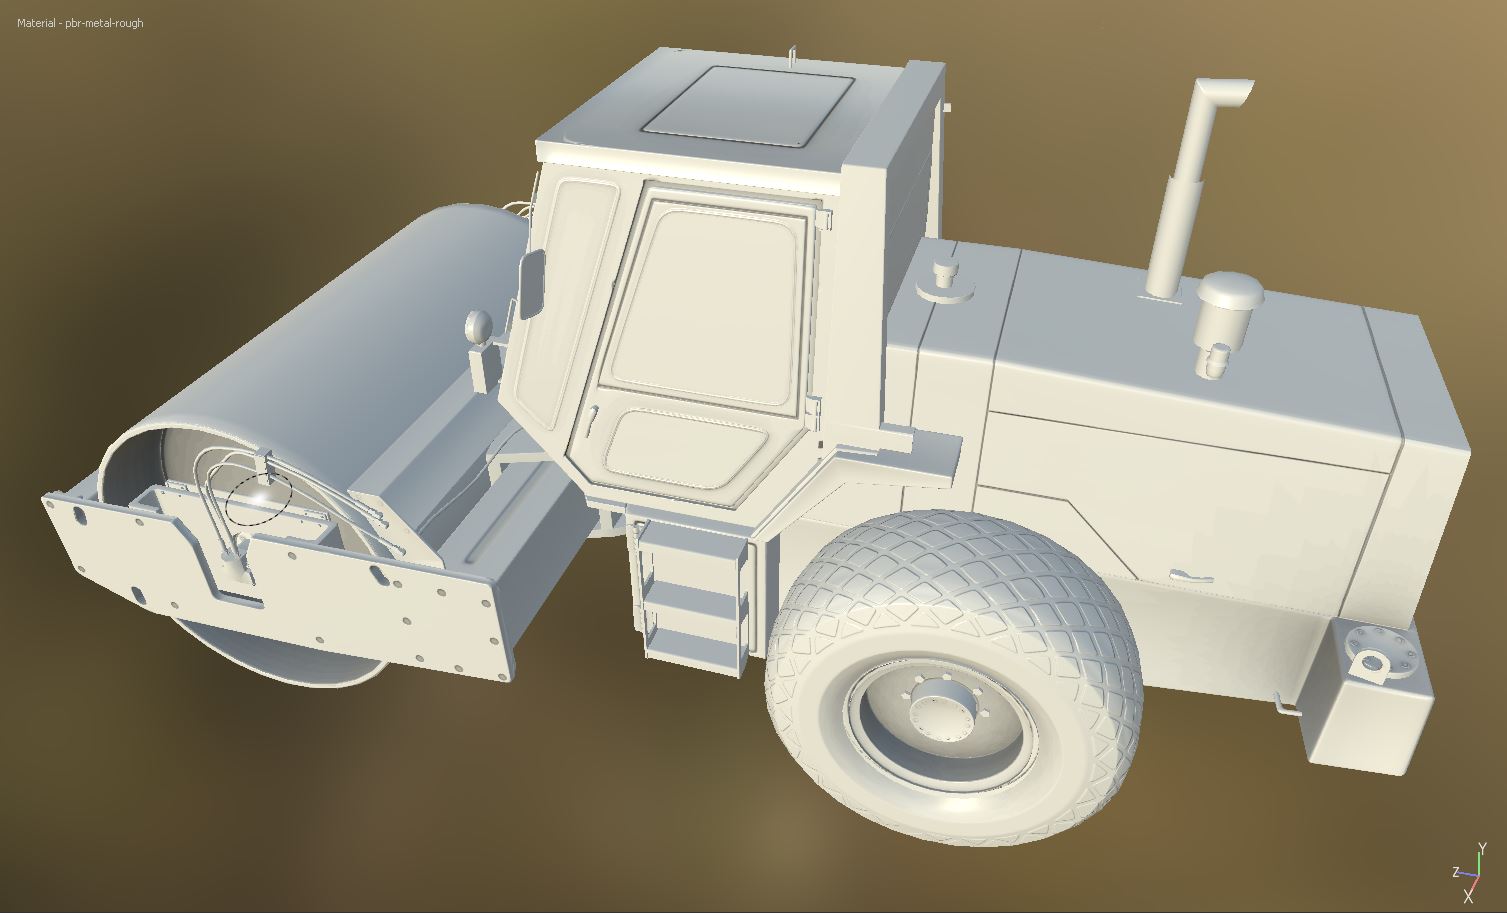
The aim of this project was to make a photo realistic model of the following vehicle.


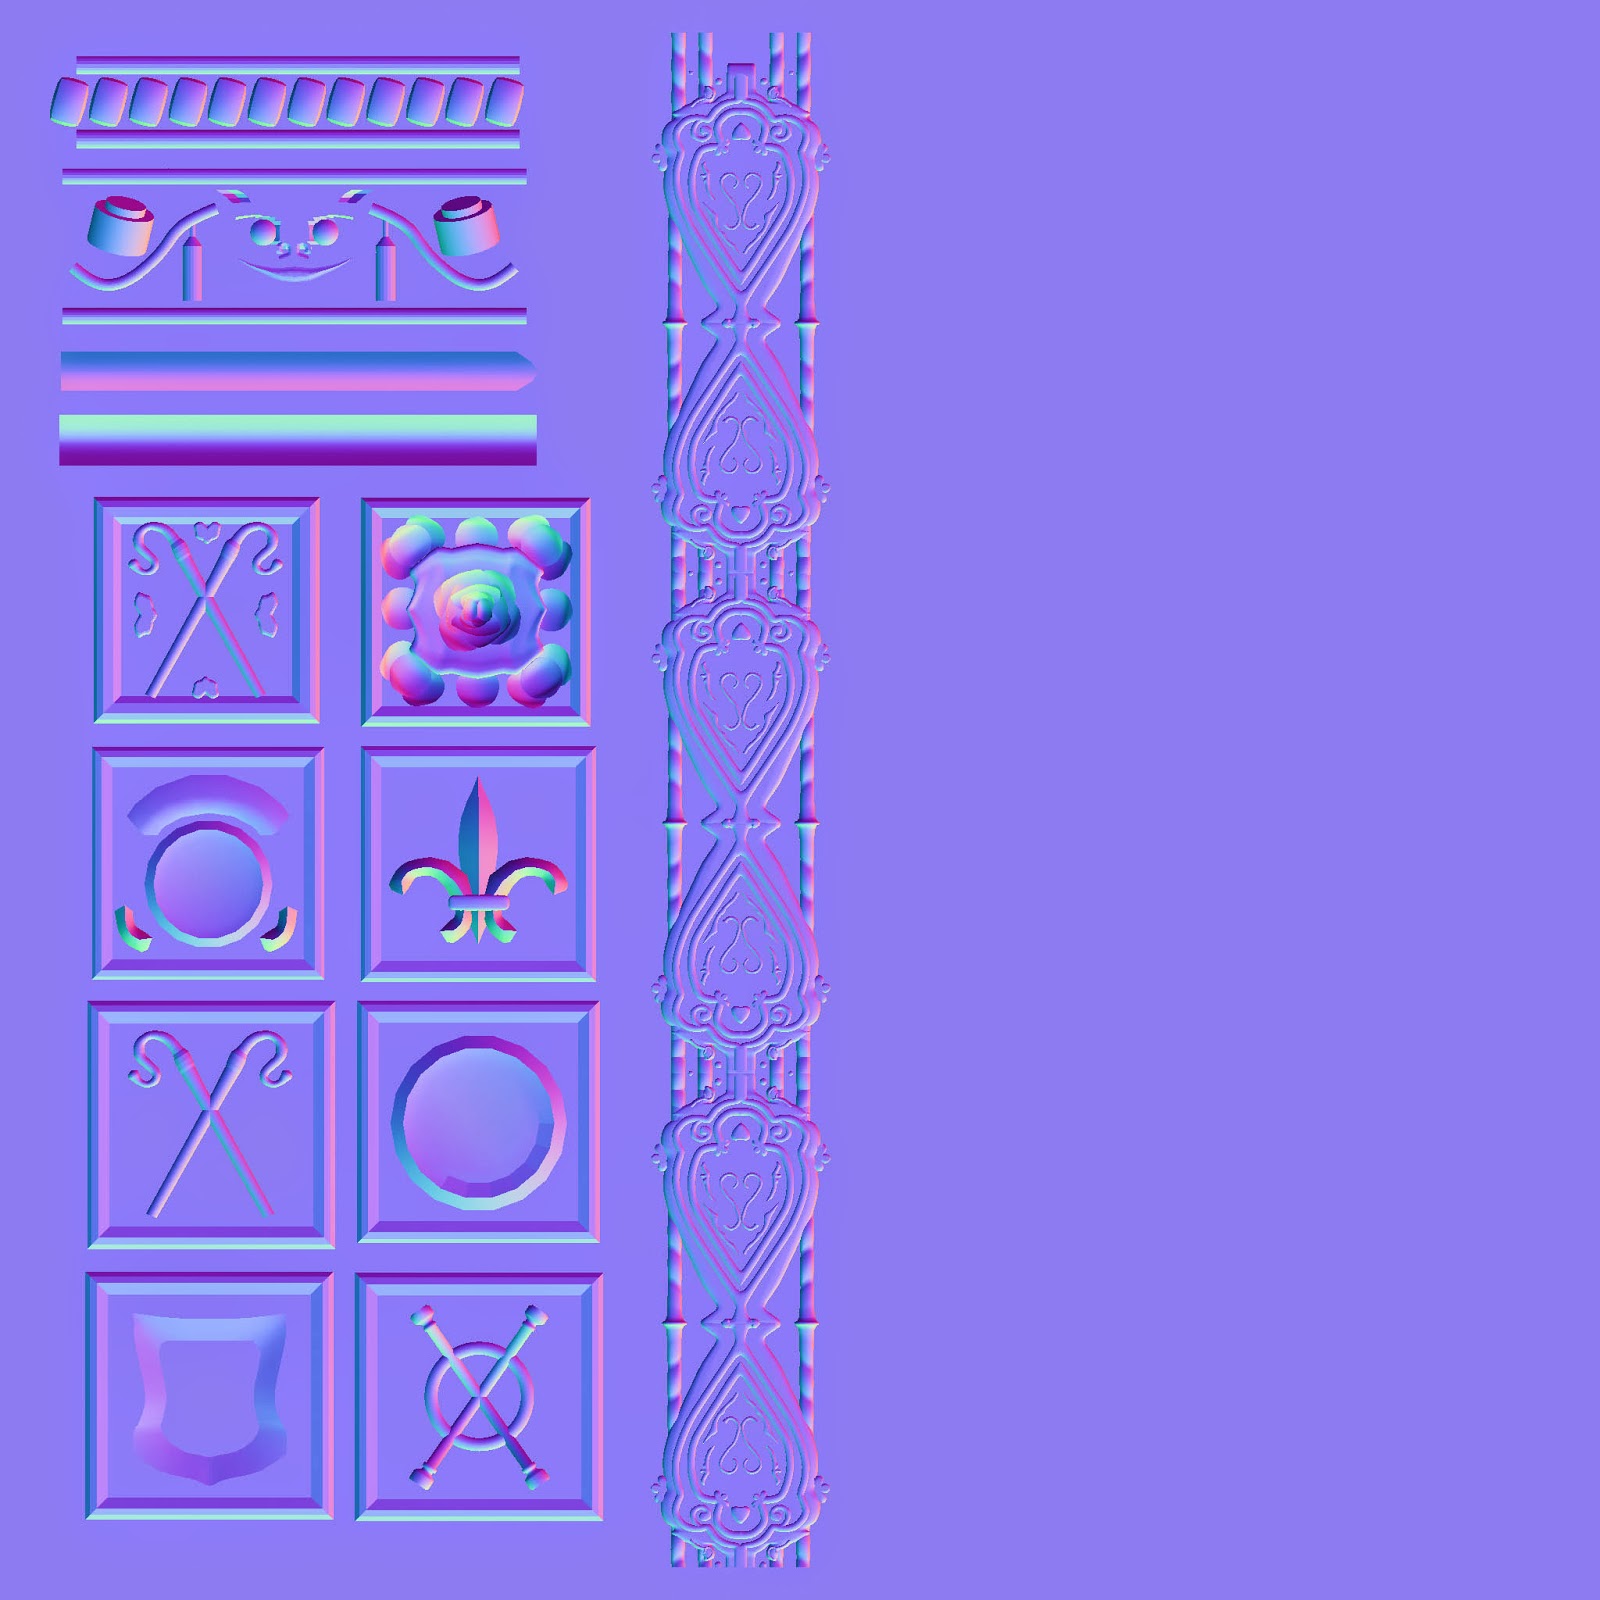
The budget was 30.000 tris and 1x2048 texture sheet. I modelled and unwrapped the mesh in 3DS Max. I used 3DS Max and Z- Brush to create high polys. I then used X-Normal to bake these meshes creating normal maps which were then composited in Photoshop. I also used Photoshop to create tillable textures and Substance Painter to texture the whole cab. I used Unreal to create the finale renders.

Research/Design

Additional Reference


Unwrap


Textures

Albedo
Roughness

Metallic


Normal
AO

Beauty Shots


Additional Relevant Imagery


Conclusion

During this project I have been constantly altering my priorities. At the start I rushed with the intention of finishing the project on time. This caused bad geometry which then had to be altered, wasting time. I then decided to really over work my unwrap. I used a 2048x2048 texture sheet in 3DS-Max to ensure that all the UV shells were 4 Pixels apart, as this is a predicted margin of error in games engines when they draw textures. Unwrapping like this took far too long, as a result I began to rush toward the end of packing creating an extremely inefficient pack towards the edges.  also I made the initial size of all the shells far to large so when I uniformly scaled them down the 4 Pixel gap shrunk, so half the shells are also to close together. The unwrap was also done with the Substance painter work flow in mind. So I made no attempt throughout the first half of packing to keep seams organised, I was completely focused on creating the most efficient pack possible. As a result the unwrap is completely unusable outside of soft wear where you paint directly onto the mesh. I then changed my priority’s again, this time I chose to simply commit to working at the highest standard and learning as much as I could, I had already made to many mistakes. From this point I spent time improving my baking and baked down many parts of the mesh which I could have easily of missed out. So I was still baking well into the 3rd week. Then Instead of trying to quickly texture the mesh using minimal Substance Painter skill I made shore to follow tutorials and develop my skill. I even spent time researching Substance Designer to sea weather this was a piece of software that could help with this project. This project has taught me to work to the highest standard from the first day especially during this time at uni, there is no point of producing bad work within a deadline, bad work will not develop my skill or my portfolio.  My unwrap will not be making an appearance in my portfolio even when I finish this project. This is a wasted opportunity to show off a good unwrap. The finished textured model due the high quality normal and my texturing is to a good enough standard.  


Wednesday, 21 October 2015

Roller: Week 3


I’ve been torn between learning new skills, completing this project, and doing work to a high standard during this week.

This is the finale week of this project, I could use this week to learn how to create high quality normals and then bake out as much of the model as is necessary. I will then start creating textures, and might get onto learning substance painter. But the model would remain untextured, failing the brief.

I could use this week to create a few low quality normals, leaving a mostly unbaked down model, and no development in baking skill. I could then quickly create some textures, and then learn substance painter and texture the model. I would then complete the brief by finishing the project in 3 weeks. But the output would not be competitive.

This year I really need to develop my technical skill. There is no point in creating subpar assets that won’t strengthen my portfolio. At this early stage I believe that it’s more important to learn new skills that then can be implemented throughout the rest of the year.

This week I have thus far developed my baking skills, and baked down allot of the model. I have learnt about many of the settings in X normal, and also a bunch of tricks though out the process that help normals to bake correctly.


E.g When baking protruding features on to a surface, often the baked normal map will make these appear to protrude at an angle. The way to eliminate this issue is to add more geometry to the low poly. This can be done vie simply adding some connections and or turbo smoothing the mesh if smoothing groups will allow this without distorting the mesh. 


I’m now going to begin creating some textures, at this current point it is extremely unlikely that I will finish texturing by Friday.

During this project I felt extremely rushed right from the start as a result I created some pore quality geometry which then had to be altered, wasting time and still resulting in a questionable mesh in places as I couldn’t completely remodel the mesh within the time. Also I rushed the second half of my unwrap, resulting in a poor unwrap. This means that even when this project is finished I won’t be able to put the texture sheets in my portfolio

At this point I feel like the last thing I need to do is rush another aspect of this project. I think it’s more important to try and create assets to the highest standard. Eventually this may not take up that much additional time, due to not having to go back and re do processes multiple times. But having already wasted time in this project re doing processes. At this point slowing down and creating high quality work and learning new processes will probably push the project past the three week point.


Tuesday, 13 October 2015

Week 2, Roller: Tuesday

Week 2 Blog

Monday Feed Back

FMP- Look into vehicle rigging, and then how to get them running in engine. This way my portfolio shows that I know how to make game ready vehicles, not just static meshes.

Finished Low Poly

It’s time to organise all the meshes and prep for the high poly. This means, aligning all the pivots, resetting all the X-Forms, checking for n-gons, collapsing symmetry (welding the seams) and generally tidying up geometry.

Tuesday

I looked at another students work. I have come to the realisation that my model is not up to par and still needs allot of work. My model is only just within the budget and has an extremely low poly interior, no mirrors, no handles and generally very few of the surface details. The model I have just seen has all of these features done to a high quality and is still within budget.

Redoing these part will set me even further back, I really had to start creating the high polys today. But when comparing my work with the other, my model currently is appalling. Leaving it as it is would be handing in terrible work. My mesh has to be altered drastically.

The problem here arose when beginning to chamfer the basic block out of the forms. When working to a budget you have to guess how many chamfers to apply to an edge from the start, then as you continue to model you have to hope that the chamfers will not eventually put you over budget. I guessed way to high, my model quickly became over budget. As a result I started cutting corners with the quality of the smaller assets, or simply removing these aspects of the Roller. But now viewing a mesh with all the details included and to a high quality, I realise that my mesh with all these features missing will not be up to par.


An Example of one of the areas that I went wrong


These are my wires they are a massive 7.500 tris, and they could actually do with a few more loops to smooth out some of the bends. The Mesh I have been comparing mine to has more loops running through there mesh so that they have a cleaner curve, but they are also under half the budget of mine. This is because when they initially created there wires they used a less round tube. I picked a 9 sided cylinder, they picked 5 or 6. This has had a huge impact on the budget of my model. These really should be done again. But this will take allot of time to remedy.

If I can potentially save up to 3000 Tri's in this area alone, I might be able to just alter these. This might give me enough tries to improve the existing external features as well as may be adding more. If not I will have to change other areas also.

At this point decisions like this will determine weather I create a bad mesh but finish. Or weather I create a good mesh and don't. Just altering the wires, if this does give me enough tries to complete the model, the mesh over all will still be poor. This means I will still loose marks here, and most importantly I will not be able to put this finished asset into my portfolio.

What I have learnt

For an asset of this complexity 30.000 tries is sufficient to make a good model, but it is not allot. You still have to be cautious with you chamfers.

When creating wires, realise that these can quickly become extremely expensive.

Don’t get carried away with the good work practice of unwrapping meshes as you create them. For this kind of asset you’re better off creating the whole asset and then unwrapping.  Only duplicated meshes need to be unwrapped immediately. During this project I have already unwrapped the same mesh multiple time due to further alterations. This has wasted huge amounts of time. The same goes for applying smoothing groups. 


Sunday, 11 October 2015

Year 3, Week 1: Roller

Picking the brief

Day 1

I really wanted a skill Tech skill based project so that I could just concentrate on learning some new programs and general processes. These new skills could then be used throughout the year to improve all following projects. This means that I was hoping for a project with no concepting faze, this would free up more time to concentrate on simply creating the best asset that I could in the time.

The tech skills that I really want to develop are my hard surface high to low poly baking to generate Normal and AO maps. I also really have to start learning Substance painter. I also need to start putting my work in marmoset to get the best out of it.

 Realistic Brief: GP Prop Brief


Create the above asset for a gritty FPS game. 30,000 Tri budget and 1x2048 Texture budget,  3 weeks.

This brief is very close to exactly what I was looking for. But with one exception, the asset is vast and complex. The Roller although at first glance may appear relatively simple, as far as its basic forms go, but there are hundreds of individual parts to understand, model, unwrap and then texture. The initial low poly stage alone for this brief will take up a huge amount of time, offsetting any time saved by not having to concept.

But I will be able to begin modelling immediately on Monday morning, I’ve also never undertook a project like this so I actually have very little idea of how long it will take. Also I have to bear in mind the extra hours that I will be committing this year, as well a greater understanding of good work practice. This year I am committed to using my lab time much more efficiently, I am there to work that is all.

Due to priory made commitments (waiting for a new computer case, a concert, cinema) this first week will be a 50 hour week. How much can I get done in this time?

GP Prop Partially Stylized Brief: Apocalyptic Weapon


You have been given the above concepts by an inexperienced concept artist. Further develop one of these designs and then create the asset for a Dead Rising style game. 10,000 Tri Budget and 1x1024 Texture Budget,  3 weeks.

I was also considering this project, but I really didn’t want to have to concept for my fist project this year.

This project looked to be allot of fun, attaching a chain saw to a shot gun is hilarious. Also this would still give me the opportunity to learn all the programs and process that I wanted to learn. I would just have to spend the first few days in Photoshop concepting.

I actually started mood boarding for this project, and even started creating a photo bash kit in Photoshop. But I kept thinking that If I were doing the Roller project I would be modelling at this very point, if I worked right up to 9.00 I could really make an impact immediately with that project.

Initial Days

After blocking in the initial shapes, I realized that there were many complex areas of the model that I needed to understand. This required a huge amount of fettling and research. Also there are allot of decisions to be made in regards to what features to include and or alter in order to help with time and tri efficiency. Also what to include in order to really sell the rollers form, characteristic and industrial tone. I have to understand that this is a game asset; it has to sit in its environment and be believable for an average gamer, not some one that has worked with these machines, so I shouldn’t try and recreate every nut and bolt.

Later Half of the week

The time it is taking to complete the low poly is far greater than I predicted.  I’m starting to worry about the standard of finish I will achieve within this time and or whether or not I will finish.

I have just been introduced to an update to 3DS Maxes chamfer. You can now tell 3DS max to only create quads when chamfering. This creates much more manageable geometry; it also only chamfers an edge in multiples of 2. This helps with unwrapping as now it’s obvious where the smoothing group seams will be places. This has been a massive help with general modelling. But it’s much more costly to the tri budget; as a result I’m trying to be conservative at this point as too not end up over budget. I have to just hope that I’m not being to costly and at the same time to conservative. With so many additional pieces to create it’s hard to tell at this point how many chamfers if any to add when modelling.
 
Feed Back

I’m right to be concerned about the amount of work that will be necessary to complete this project to a high standard. All I can do to help this process to continue to work hard. For the upcoming week I should be able to attend Labs between 9 and 9 every day. Also I need to try harder to maintain a high level of concentration throughout the day. There are many things to consider here that may or may not help. For example I barely listened to music on Thursday and Friday in an attempt to limit distractions, but this then this meant that I could hear the general chatter in the room, which is then a distraction. A middle ground could be to only listen to nonabrasive instrumental tracks.

I was also advised to not use Marmoset for this project, as using Unreal instead will show the ability to make the asset work in Engine, this is something that using Marmoset will not.

Progress


Friday, 15 May 2015

Post-Mortem : Off the Map


This project is another strange one. Throughout this project we as a group have been constantly teased about how our group is probably producing one of the best projects.

I personally was constantly uneasy about this as I could see the manic nature in which we were dealing with tasks, especially towards the end.


I personally right from the start of the project was quick to try and separate myself from the rest of the group. I did this by asking for full responsibility over a whole area. This was going to be the canal area. I also was always going to be responsible for the Puzzle room.


I did this so that I could work solely right from concepting to the finished in engine world that I could put straight into a portfolio. Also working like this puts more pressure on myself to be good at all parts of the process, and also to always work consistently to a high standard. This area was always going to be photorealistic. Basically I wanted complete control over an area within which I would not have to compromise on quality.

This area was going to be first person so that all aspects of it in all dimensions would have to look good. Very early on I suggested that I would be willing to make this area a side scroller, as a compromise so that I could sooner finish and help in other areas.

This at the time was deemed unnecessary at this point. I also throughout the project expressed that I would be willing to drop this entire area, I never wanted my decisions to be detrimental to our level. There would always be plenty of areas, props and general assets for me to get my teeth into, even without the canal area.


 I personally really enjoyed working on this area especially when I was starting to get some really nice screen shots of the grass. I then started to get efficient at the foliage workflow, and was past the beginning, slow learning faze. A lot of the foliage was created relatively fast.


At points during this project I felt like I wasn’t working fast enough and was stalling. But this was due to learning new things about complex materials/ shaders. I now have a decent working knowledge of creating complex materials including Tessellation, complex grass wind, macro variation, Decals, multiplying normal, using multiples of all the maps tiled and not tiled, foliage shaders etc.


I also spent a week learning how to create game ready rock assets. So I learnt How to create the high poly in Z-Brush and how to artistically approach rock creation, which brushes to use, decimation, Dyna Mesh, unwrapping in Z-Brush and applying surface detail in Z-Brush.


I also during this project really pushed high to low poly backing, nearly every part of every asset has been detached and had a high poly made, which has then been backed down onto the low poly to create an AO map and a normal. This has been extremely successful especially in simply smoothing out the edges of relatively low poly assets.


I have also used many other processes during this project although I didn’t learn them in this project I have used them. For example a projection mapping pass is often a part of my asset creating, as is poly painting in Z-Brush and using spotlight. 

As with our projects as a group I feel like there was three core issues

Skill set differences

Our group of 6 had 4 character artist, we had no concept artist, and at the start I don’t think anyone actually wanted to really push engine work. So we had an imbalance.  We gave out the character art roles to these people. But this brings me to the next point.

We had a major skill level difference across the group. Half the group were past the learning faze for many processes so could produce work much faster than others. Where some people felt that they needed to spend only 4 weeks on a character or major asset, for others 13 was more appropriate. This basically took some people out of the project completely, instead of being part of the group and producing assets, they would be responsible for one asset. This would then leave our group 2 or 3 people short for the vast majority of the project. Obviously we as a group could have made compromises here. We could have dropped a character, this would free up one person. Or a stronger member of the group could have been given multiple characters, thus leaving some budding character artists character less. I understand that doing this would have been extremely selfish, although this would have resulted in a better project, this would have stunted the personal development of certain members of our group. If you want to be a character artist you are going to want to develop skills in this area regardless on weather this will actually be detrimental to your grade.

Art style differences

Some members of our group would have felt allot more comfortable working much more stylised. The majority of our group wanted to work realistic so this is what we did. This placed some members outside of their comfort zone, and thus may have stunted there enthusiasm and willingness to really push the project.

Bottle neck with engine

For the vast majority of the project two members of the group were working on two separate engine files for different areas. I feel now that we merged these files much too early. This lead to a bottle neck right at the end of the project when we were importing the finale assets. The singular person now responsible for all the world building and re-importing had a near impossible work load. This lead too many assets being forgotten, having the wrong textures applied or no texture applied and generally poor quality world building “propulasion”. The problems here can be fixed extremely easily and I know that it can be done extremely well given time, but for the DMU deadline the above was the case.


Personally during this project I did spend allot of time developing two complex assets that eventually were not used for the DMU hand in. These were the Bridge and the Boat Shed. This means that these assets were actually a waste of time. This obviously would have been detrimental to our level. The effects of this could have been reduced had we dropped the canal area sooner. Sadly we didn’t, it was dropped just before the last week. This occurred because the canal area potentially wasn’t our worst looking area up to this point it’s simply that this wasn’t one of the core game play areas. We had to drop an area in order to finish on time, so the canal the smallest part of the game had to go.

Basically to summarize this project I am going to use this single screen shot from our level.


This is our menu and start screen, yes this is a good image. But I know that it could be allot better. As this is a singular image the grass here could have been denser to hide the planes. The trees going off into the distance should be denser. I created many many different plants during this project and only a small amount of them are in this image. Their is potential here to actually use the boat shed and or the bridge. Also the Gunneras and the Gunnera flowers I created mid project aren't actually in out finale level anywhere. The models that are being used in the current level are unfinished, but they were never replaced in time for the deadline. My finale Gunneras could have been used here at least as they are only present currently in my personal engine file. Sadly none of the above is present in the above image. Although I say these things this is not a personal gripe at any member of out team, we simply ran out of time, given the circumstances we pt our selves in we did the best we could. But that doesn't make the finale screen shots any less frustrating to look through.  


Hope fully all the issues I have listed can be easily resolved for the Off the Map official hand in. 


Stalagmites : Off the Map


I made this in Z-Brush using Z-Spheres to create the basic forms, I then worked in to this to create the high poly. Here I have included the Stalagmites and the Stalactites in the same mesh.

Super Last Minute Texturing


At this point I was just grabbing any assets that were yet to be textured.

Even though these were extremely rushed textures, I tried very hard not to compromise too much. After high to low poly baking nearly all my assets up to this point and seeing the effect of baking a simple chamfer on to a 90% edge it was important to me not to miss this step.


This is the very last asset I textured, right on the last day. I would have liked to have included more material variation, but I was seriously limited by time at this point. Also I did this on my home computer so I had limited axes to Normal map creation software. I only managed to borrow a flat mates computer for about 5 minutes, during this time I created the normal map and AO map for a tillable Hammered steal texture I created.

This was really quite enjoyable, hammered steal made for a nice material study. Also its always fun to see just how far you can push normal maps. 


Oh and I also did the label and cork for this bottles. After I put so much work into all the other textures, I actually felt guilty not high/low poly baking the cork of this bottle, But I was simply out of time. 


Monday, 11 May 2015

Last Push Before DMU Hand In


Although I have done tones of work towards the Canal section of our game. In this late stage with the deadline looming over us we have decided to drop this section for now. This means that the Bridge and Shed won’t actually be used. But these will be used for the off the map dead line.


Nearly all the other assets though are being used throughout the forest level.


 So I have gone straight back into finishing the Puzzle Room. Here I have grabbed the roof which I already made, a large sculpture wall thing, the hall way door and wall that Jake made. Now I can get a feel for the room again. Firstly I re-made the wall sculpture thing, I made it reminiscent of Christchurch ceilings.


 To do what I wanted with Jakes door turned out to be nearly impossible, so I modeled my own.


I taught Hannah how to projection map. As a result she created these complex designs, which I used in my own work. I’m really happy with what she created here these were extremely successful.


Here I have added in the floor. One of the pieces of feedback we received was to make the floor pattern draw focus to the Glass table. So that’s what I have done here. Originally this floor pattern had circular rings converging on the centre but after I started texturing the floor I decided this was going to take too much time. This was due to the floor texture being a single large texture, it isn’t a tillable. I was individually selecting tiles and filling them in in Photoshop, the rings had far too many tiles in them for this to be a feasible design.


 I did a planet


This is the finished Puzzle Room. I am really pleased with this.